티스토리 뷰
node.js로 어플리케이션 제작
작업 PC에 Node.js를 설치합니다. -> nodejs.org/ko/
1) 새 nodejs 프로젝트 생성
> mkdir cicd & cd cicd
> mkdir hellonode & cd hellonode
> npm init
package name: (hellonode)
version: (1.0.0)
description:
entry point: (index.js)
test command:
git repository:
keywords:
author:
license: (ISC)
About to write to /Users/happycloudpak/work/tmp/cicd/hellonode/package.json:

{
  "name": "hellonode",
  "version": "1.0.0",
  "description": "",
  "main": "index.js",
  "scripts": {
    "test": "echo \"Error: no test specified\" && exit 1"
  },
  "author": "",
  "license": "ISC"
}


Is this OK? (yes) y
2) 어플리케이션 개발
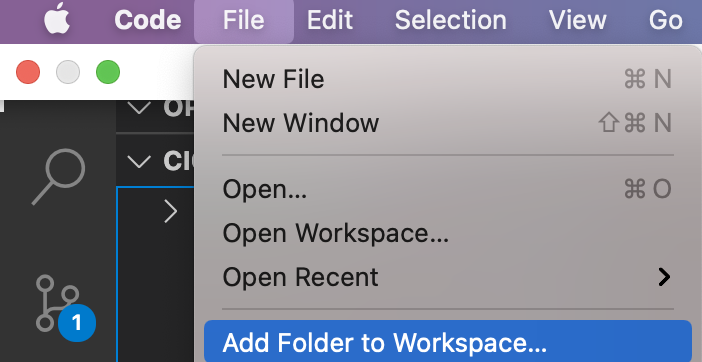
vscode를 실행하고, hellonode폴더를 작업영역에 추가합니다.

아래 각 폴더와 파일을 만듭니다.
- index.js
var express = require('express');
var bodyParser = require('body-parser');

var app = express();
app.use(express.static('./public'));
app.use(bodyParser.urlencoded({extended:false}));

var mainRouter = require('./routes/main.js');
app.use(mainRouter);

//start server
var port = (process.env.PORT || 8081);
//console.log('port:' + port);
app.listen(port, () => {
    console.log('Listen: ' + port);
});
- routes/main.js
var express = require('express')
var router = express.Router()
var bodyParser = require('body-parser');
var fs = require('fs')
var ejs = require('ejs')

router.use(bodyParser.urlencoded({ extended: false }))

router.get("/", function (req, res) {
    res.redirect('/main');
})

router.get("/main", function (req, res) {
    console.log("main page")

    fs.readFile('./html/main.html', 'utf-8', function (error, data) {
        res.send(data)
    })
})

module.exports = router;
- html/main.html
<!DOCTYPE html>
<html lang="ko">
<head>
<title>Main</title>
</head>
<body>
<h1>Main page</h1>
Hello, Nice to meet you !!!
</body>
</html>
3) 라이브러리 설치
- Terminal을 오픈 합니다.

- index.js, main/main.js의 require문에 지정된 라이브러리를 설치합니다.
--save옵션을 주어 package.json에 종속 라이브러리가 dependency항목 밑에 추가되도록 합니다.
npm install --save express body-parser express fs ejs*4) 테스트 *
- package.json을 열어, scripts.start구문에 'node index.js'를 추가합니다.
{
  "name": "hellonode",
  "version": "1.0.0",
  "description": "",
  "main": "index.js",
  "scripts": {
    "start": "node index.js",
    "test": "echo \"Error: no test specified\" && exit 1"
  },
  "author": "",
  "license": "ISC",
  "dependencies": {
    "body-parser": "^1.19.0",
    "ejs": "^3.1.6",
    "express": "^4.17.1",
    "fs": "0.0.1-security"
  }
}
- Terminal에서 npm start를 실행합니다.
❯ npm start

> hellonode@1.0.0 start /Users/happycloudpak/work/cicd/hellonode
> node index.js

Listen: 8081
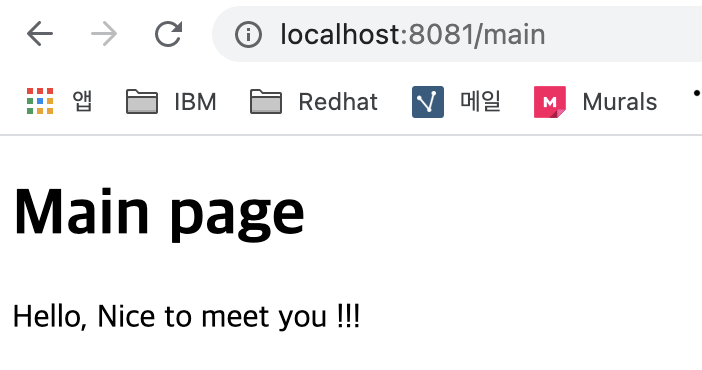
- web browser에서 http://localhost:8081를 오픈합니다.

*github에 project 생성 후 vscode에서 pull/push *
1) github에 project 생성
github.com/에 로그인 후 project를 생성할 organization으로 이동합니다.


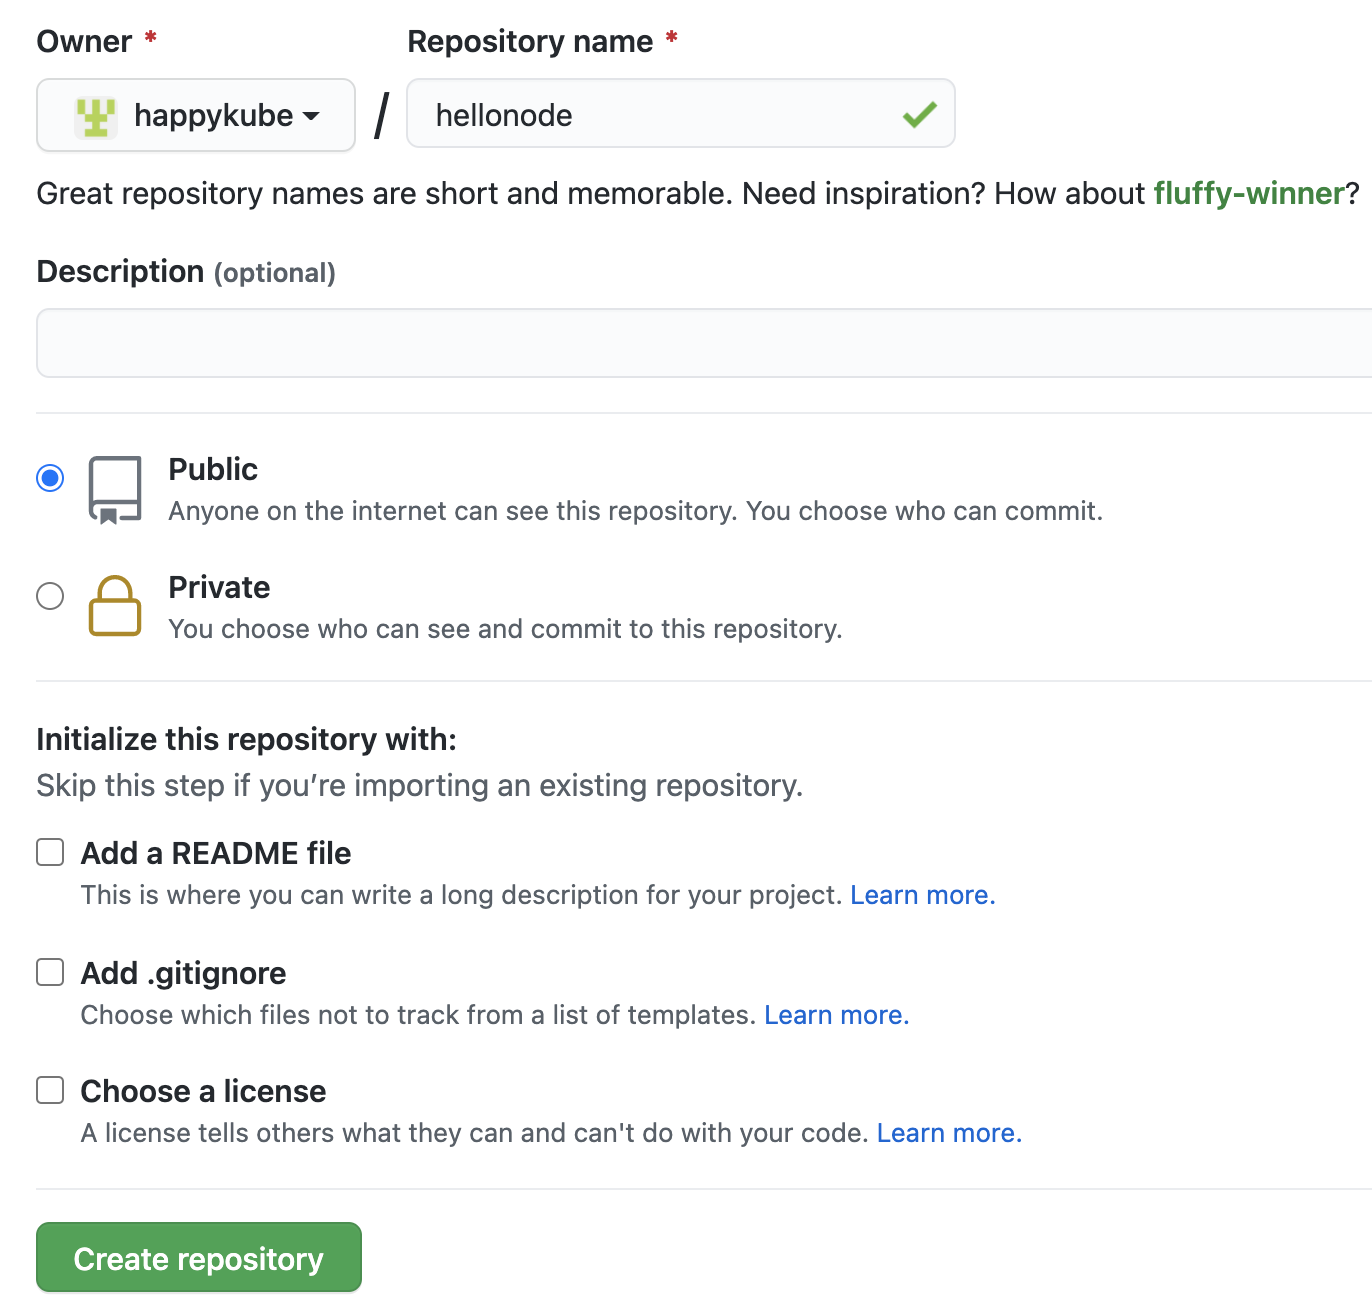
[New]클릭하세요.

repository name입력하고, 'Public'으로 선택하세요. 그리고, [Create repository]를 클릭합니다.

위 git url을 복사합니다.
2) vscode terminal에서 아래 명령으로 위에서 생성한 git repository와 연결된 Local git repository를 만듭니다.
- git local repository 초기화
~/work/cicd/hellonode main*
❯ git init
/Users/happycloudpak/work/cicd/hellonode/.git/ 안의 기존 깃 저장소를 다시 초기화했습니다
- branch 'main' 작성: github는 인종차별운동 동참을 위해 default branch를 master에서 main으로 변경하였습니다.
$ git checkout -b main
- Local git repository의 원격 git repogitory의 주소를 'origin'이라는 이름으로 연결합니다.
~/work/cicd/hellonode main*
❯ git remote add origin https://github.com/happykube/hellonode.git
Tip) 작업PC에서 여러개의 git id를 사용하는 경우에는 원격 git url을 추가할때 아래와 같이 대상 git의 user id를 지정하십시오.
안하면 마지막으로 push했던 git user id로 push하려고 해서 에러가 납니다.
예) git remote add origin https://happycloudpak@github.com/happykube/hellonode.git
3) 원격 git repository로 push합니다.
vscode설치, git push방법은 아래를 참조하세요.
happycloud-lee.tistory.com/205?category=832250
TIP) 작업PC에서 최초로 git push하는 경우는 아래와 같이 user.name과 user.email을 셋팅해야 합니다.
git config --global user.name "이해경"
git config --globel user.email "hiondal@gmail.com"
TIP) push할때마다 암호를 묻지 않게 하려면 아래 예와 같이 credential정보를 캐싱합니다. 아래예는 1시간 캐싱.
git config credential.helper 'cache --timeout=3600'TIP) vscode의 기능을 이용하지 않고, git 명령을 이용하려면 아래 예와 같이 하십시오.
git add . && git commit -m "commit first" && git pushTIP) git에 대한 주요 사용법은 아래 링크를 참조하세요.
happycloud-lee.tistory.com/93?category=832250
'Agile&DevOps > 실습 with Jenkins' 카테고리의 다른 글
| Jenkins 실습 06: git연동 (0) | 2019.09.12 |
|---|---|
| Jenkins 실습 05: 배포Image 보안 검사 추가 (0) | 2019.09.12 |
| Jenkins 실습 04: 소스 정적 검사 추가 (0) | 2019.09.12 |
| Jenkins 실습 03: 기본 Pipeline (0) | 2019.09.12 |
| Jenkins 실습 01: 실습툴 및 순서 (0) | 2019.09.12 |
- Total
- Today
- Yesterday
- API Composition
- 애자일
- 호모프롬프트
- 스포티파이
- agile
- 버라이어티가격
- 디토소비
- 도파밍
- 마이크로서비스 패턴
- 요즘남편 없던아빠
- 리퀴드폴리탄
- SAGA
- AXON
- 스핀프로젝트
- spotify
- 분초사회
- 돌봄경제
- Event Sourcing
- CQRS
- micro service
- 육각형인간
- 마이크로서비스
| 일 | 월 | 화 | 수 | 목 | 금 | 토 |
|---|---|---|---|---|---|---|
| 1 | 2 | 3 | 4 | 5 | 6 | 7 |
| 8 | 9 | 10 | 11 | 12 | 13 | 14 |
| 15 | 16 | 17 | 18 | 19 | 20 | 21 |
| 22 | 23 | 24 | 25 | 26 | 27 | 28 |
