티스토리 뷰
1. 설치
$ dnf install mysql-server
2. 서버 시작
$ systemctl start mysqld
$ systemctl status mysqld
3. VM재시작 시 자동 mysql 서버 시작 하게 설정
$ systemctl enable mysqld
4. 보안설정
$ mysql_secure_installation
초기 암호는 없으므로, 그냥 엔터 치면 됩니다.
암호의 validation policy level은 테스트시에는 쉬운 암호를 지정하기 위해 0으로 하세요.
단, 실제 운영시에는 2로 하셔야 합니다.
[root@ondal ~]# mysql_secure_installation

Securing the MySQL server deployment.

Connecting to MySQL using a blank password.

VALIDATE PASSWORD COMPONENT can be used to test passwords
and improve security. It checks the strength of password
and allows the users to set only those passwords which are
secure enough. Would you like to setup VALIDATE PASSWORD component?

Press y|Y for Yes, any other key for No: y

There are three levels of password validation policy:

LOW    Length >= 8
MEDIUM Length >= 8, numeric, mixed case, and special characters
STRONG Length >= 8, numeric, mixed case, special characters and dictionary                  file

Please enter 0 = LOW, 1 = MEDIUM and 2 = STRONG: 0
Please set the password for root here.

New password:

Re-enter new password:

Estimated strength of the password: 50
Do you wish to continue with the password provided?(Press y|Y for Yes, any other key for No) : y
By default, a MySQL installation has an anonymous user,
allowing anyone to log into MySQL without having to have
a user account created for them. This is intended only for
testing, and to make the installation go a bit smoother.
You should remove them before moving into a production
environment.

Remove anonymous users? (Press y|Y for Yes, any other key for No) : y
Success.


Normally, root should only be allowed to connect from
'localhost'. This ensures that someone cannot guess at
the root password from the network.

Disallow root login remotely? (Press y|Y for Yes, any other key for No) : y
Success.

By default, MySQL comes with a database named 'test' that
anyone can access. This is also intended only for testing,
and should be removed before moving into a production
environment.


Remove test database and access to it? (Press y|Y for Yes, any other key for No) : y
 - Dropping test database...
Success.

 - Removing privileges on test database...
Success.

Reloading the privilege tables will ensure that all changes
made so far will take effect immediately.

Reload privilege tables now? (Press y|Y for Yes, any other key for No) : y
Success.
5. 외부에서 접속할 수 있도록 설정
$ mysql -u root -p
mysql > create user 'root'@'%' identified by '{암호}';
mysql > grant all privileges on *.* to 'root'@'%';
mysql > flush privileges;
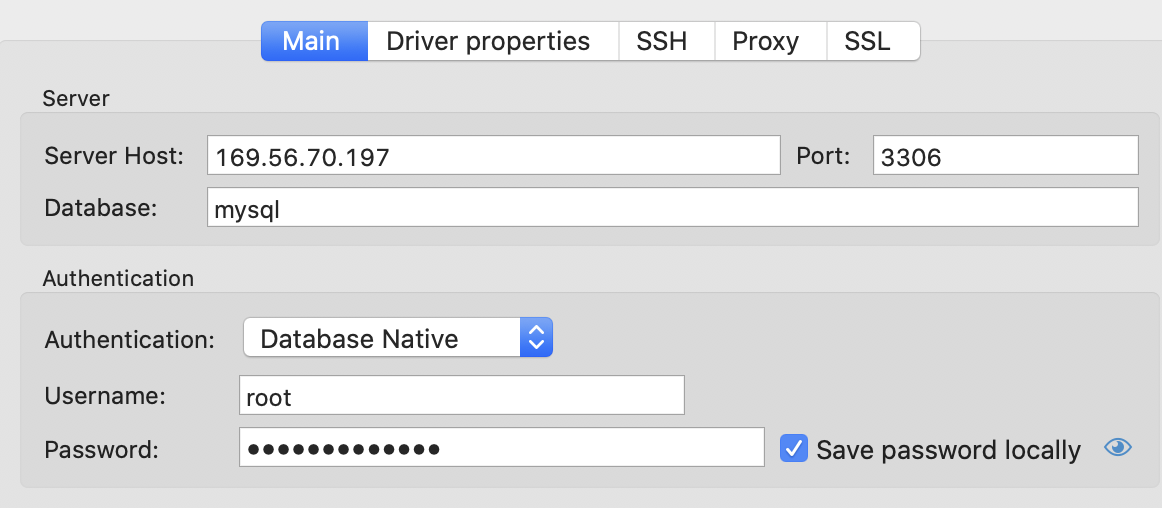
자동 생성된 Database를 보려면 mysql > show databases; 명령을 이용하세요.
기본 포트는 3306입니다.

6. Database생성, User생성 및 권한부여
1) Database생성
[root@ondal ~]# mysql -u root -p
Enter password: {root password}

mysql> CREATE DATABASE {DB명} default CHARACTER SET UTF8;
Query OK, 1 row affected, 1 warning (0.02 sec)

mysql> show databases;
+--------------------+
| Database           |
+--------------------+
| information_schema |
| msa                |
| mysql              |
| performance_schema |
| sys                |
+--------------------+
5 rows in set (0.00 sec)
2) User생성
mysql> create user '{username}'@'%' identified by '{password}';

ex) user명 'msa', 암호 'happy@cloud'로 생성
mysql> create user 'msa'@'%' identified by 'happy@cloud';
Query OK, 0 rows affected (0.02 sec)
참고) 생성된 유저 확인
mysql > select host, user from mysql.user;
+-----------+------------------+
| host      | user             |
+-----------+------------------+
| %         | admin            |
| %         | root             |
| localhost | mysql.infoschema |
| localhost | mysql.session    |
| localhost | mysql.sys        |
+-----------+------------------+
5 rows in set (0.05 sec)
참고) 유저 삭제
mysql> drop user '{user name}'@'{host}';
ex) drop user 'user1'@'%';
3) 생성한 user에게 DB접근 권한 부여
mysql> grant all privileges on {DB명}.* to '{User명}'@'%';
ex) db명 'msaDB', user명 'msa'
mysql> grant all privileges on msaDB.* to 'msa'@'%';
Query OK, 0 rows affected (0.01 sec)

mysql> flush privileges;
Query OK, 0 rows affected (0.02 sec)
참고) TABLE 생성 SQL예제
Table을 생성할 Database로 변경 후 실행하세요.
mysql> use msaDB;
sample1)
CREATE TABLE `tb_user` (
  `id` int(11) unsigned NOT NULL AUTO_INCREMENT,
  `user_id` varchar(50) DEFAULT NULL,
  `user_nm` varchar(250) DEFAULT NULL,
  `addr` varchar(500) DEFAULT NULL,
  `cell_phone` varchar(250) DEFAULT NULL,
  `agree_info` varchar(50) DEFAULT NULL,
  `birth_dt` varchar(50) DEFAULT NULL,
  PRIMARY KEY (`id`)
) ENGINE=InnoDB AUTO_INCREMENT=4 DEFAULT CHARSET=UTF8;
sample2)
#order
CREATE TABLE `tb_order` (
  `order_id` varchar(50) NOT NULL,
  `order_usr_id` varchar(20) NOT NULL,
    `order_dtm` varchar(20) DEFAULT NULL,
    `order_tot_amt` int DEFAULT NULL,
    `acc_pnt` int DEFAULT NULL,
    PRIMARY KEY (`order_id`)
) ENGINE=InnoDB DEFAULT CHARSET=UTF8;'Open Sources' 카테고리의 다른 글
| VM간 암호 입력 없이 보안을 보장하면서 접근 시키기: SSH key 구성 (0) | 2021.08.23 |
|---|---|
| github push 에러: Support for password authentication was removed (0) | 2021.08.21 |
| Java 소스로부터 클래스다이어그램 만들기-ObjectAid (0) | 2021.03.30 |
| visual studio code(vscode) 설치, 구성, 삭제 (0) | 2021.02.07 |
| jMeter를 이용한 Stress Test (0) | 2021.01.26 |
댓글
최근에 올라온 글
최근에 달린 댓글
- Total
- Today
- Yesterday
TAG
- 육각형인간
- agile
- 마이크로서비스 패턴
- CQRS
- micro service
- 마이크로서비스
- 디토소비
- 분초사회
- 요즘남편 없던아빠
- 돌봄경제
- 애자일
- 스포티파이
- AXON
- 리퀴드폴리탄
- SAGA
- 버라이어티가격
- spotify
- API Composition
- 도파밍
- 호모프롬프트
- 스핀프로젝트
- Event Sourcing
| 일 | 월 | 화 | 수 | 목 | 금 | 토 |
|---|---|---|---|---|---|---|
| 1 | 2 | 3 | 4 | 5 | 6 | 7 |
| 8 | 9 | 10 | 11 | 12 | 13 | 14 |
| 15 | 16 | 17 | 18 | 19 | 20 | 21 |
| 22 | 23 | 24 | 25 | 26 | 27 | 28 |
글 보관함
