티스토리 뷰
helm chart repository로 github를 이용하는 방법을 설명하겠습니다.
사전에 https://github.com/ 으로 접근하여 계정을 하나 만듭니다.
본 글에서는 'happycloudpak'이라는 계정을 이용하여 설명합니다. 예제를 따라할 때 반드시 계정명은 본인의 github계정명으로 바꾸십시오.
작업순서는 아래와 같습니다.
1. github에 새로운 repository 생성과 접근 URL셋팅
2. Local에 git repository 생성
3. 첫번째 helm chart 가져오기
4. github로 Push
5. Local에 github helm repository 추가하기
6. 테스트
1. github에 새로운 repository 생성과 접근 URL셋팅
1) repository 페이지 접근

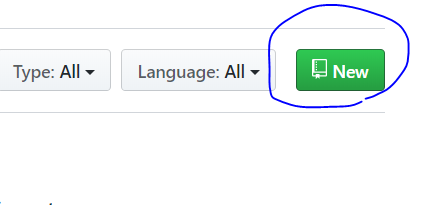
2) [New] 클릭

3) repository 이름을 입력하고, initialize 옵션을 체크

4) 접근 URL 셋팅
- Settings 클릭

- 밑으로 쭉 내리면 'GitHub Pages'라는 항목이 나옵니다. Source를 'master branch'로 선택하십시오.
선택하고 나면 스크롤이 제일 위로 올라갈겁니다. 다시 내려 보면 접근할 수 있는 페이지 주소가 표시됩니다.
이 주소가 helm repository 주소가 됩니다. 메모장에 잘 기록해 놓습니다.

2. Local에 git repository 생성
1) git 주소 복사하기


2) Local git repository 만들기
이제 Local VM의 콘솔에서 작업합니다.
# cd
# git clone https://github.com/happycloudpak/helm-charts.git

# cd helm-charts
# mkdir stable
# mkdir incubator
stable버전, incubator버전을 따로 관리하기 위해 디렉토리를 만듭니다.
3. 첫번째 helm chart 가져오기
helm repository는 helm chart들의 목록을 담고 있는 index.yaml파일이 있어야 Local에 helm repo add 명령으로 추가가 됩니다. 그러기 위해서는 먼저 구글 helm repository에서 helm chart를 가져와 index.yaml파일을 생성한 후 github에 푸시하여야 합니다.
1) 첫번째 helm chart 가져오기
# cd stable
# helm fetch stable/redis -d ~/helm-charts/stable
구글 helm repository에서 redis chart를 현재 디렉토리인 stable로 가져옵니다. 압축파일형태로 chart가 생성됩니다.

2) index.yaml만들기
# helm repo index ~/helm-charts/stable

4. github로 Push
이제 Local repository의 변경된 내용을 github의 helm repository로 push합니다.
1) commit하는 사용자명과 email을 먼저 셋팅해야 합니다. email과 이름은 본인걸로 바꾸십시오.
# git config --global user.email "happycloudpak@gmail.com"
# git config --global user.name "HappyCloud"
2) commit 수행
# git add ~/helm-charts && git commit -m "commit first chart" && git push origin master
-m 다음 큰따옴표 안의 글은 commit 메시지입니다. 마음대로 바꾸십시오.

* TIP: username이나, 암호가 틀린 경우 다시 commit하면 commit할게 없다고 나올겁니다. 이때는 아래 명령을 다시 한번 수행하고 하시면 됩니다.
# helm repo index ~/helm-charts/stable
3) github의 helm chart repository로 접근하여, 정상적으로 업로드된것을 확인합니다.

5. Local에 github helm repository 추가하기
helm chart를 검색하거나 설치하려면 Local에 repository가 등록되어 있어야 합니다.
# helm repo list

제 화면과는 당연히 다르겠지만, 현재 repository에는 아직 새로 만든 github repository가 등록 안 되어 있습니다.
1) helm repository 추가
# helm repo add github-stable https://happycloudpak.github.io/helm-charts/stable
repository는 index.yaml이 존재하는 경로여야 하기 때문에 맨 끝에 stable을 붙인겁니다.
# helm repo list
이제 아래와 같이 repository가 추가 되었습니다.

# helm search redis
이제 helm search로 redis 차트를 찾아보면 github-stable repository에 있다고 나올겁니다.

2) chart목록 갱신하기
chart를 하나 더 추가하고, 제대로 search가 되는지 봅시다. 아래 명령을 실행하십시오.
# cd ~/helm-charts
# helm fetch stable/mariadb -d stable
# helm repo index stable
# git add . && git commit -m "add mariadb" && git push origin master
# helm search mariadb
mariadb를 github-stable에서 못 찾을 겁니다.

# helm repo update
# helm search mariadb
helm repo update로 chart 목록을 다시 각 repository 서버에서 가져와 갱신하면 이제 제대로 검색됩니다.

6. 테스트
이제 github-stable에 있는 chart를 이용해 설치가 제대로 되는지 테스트 해 봅니다.
먼저 테스트를 위해 namespace를 하나 만듭니다.
# kubectl create namespace helmtest
redis 를 설치해 봅니다.
# helm install github-stable/redis --name myredis --namespace helmtest
콘솔에 메시지가 쭉 나오면서 아래 메시지 비슷한게 나오면 일단 설치는 된겁니다.

# kubectl get all -n helmtest
POD가 생성은 되었는데 정상적인 상태는 아닐겁니다.
제대로 설치하기 위해서는 좀 더 많은 작업이 필요 합니다. 이 부분은 별도의 글에서 다시 설명하겠습니다.
어쨋튼 git hub의 helm repository에서 chart를 가져와 설치하는건 정상적으로 된 겁니다.

# helm delete myredis --purge
배포된 helm chart를 영구 삭제 합니다.
TIP) helm chart를 구글, 다음 같은 검색엔진에서 crawling(수집)하지 않게 하려면 robots.txt파일을 아래 내용으로 만듭니다.
# cd ~/helm-charts
# vi robots.txt
“User-Agent: *nDisallow: /”
# git add . && git commit -m "add robots.txt" && git push origin master
'Agile&DevOps > helm' 카테고리의 다른 글
| 4. Helm chart 이용 Jenkins CI/CD Pipeline: 기본 (0) | 2019.09.11 |
|---|---|
| 3. chartmuseum으로 private helm registry 만들기 (0) | 2019.09.11 |
| 2. Helm chart 생성, 테스트, 패키징, Helm Repository에 배포하기 (2) | 2019.09.10 |
| 1. 기존 Helm chart 설치, 업그레이드, 삭제 (0) | 2019.09.10 |
| 0. helm 정의 및 설치 (0) | 2019.09.07 |
- Total
- Today
- Yesterday
- 분초사회
- AXON
- 플러그인
- agentic ai
- 마이크로서비스 패턴
- 애자일
- 요즘남편 없던아빠
- 스포티파이
- micro service
- 마이크로서비스
- #MAS
- 호모프롬프트
- 디토소비
- AI
- API Composition
- Event Sourcing
- 버라이어티가격
- SAGA
- 돌봄경제
- 도파밍
- 육각형인간
- CQRS
- agile
- spotify
- 리퀴드폴리탄
- 스핀프로젝트
| 일 | 월 | 화 | 수 | 목 | 금 | 토 |
|---|---|---|---|---|---|---|
| 1 | 2 | 3 | 4 | 5 | 6 | 7 |
| 8 | 9 | 10 | 11 | 12 | 13 | 14 |
| 15 | 16 | 17 | 18 | 19 | 20 | 21 |
| 22 | 23 | 24 | 25 | 26 | 27 | 28 |
