티스토리 뷰
작성중...
사전준비
- VM준비하기
https://happycloud-lee.tistory.com/11?category=832251
- helm 설치
https://happycloud-lee.tistory.com/3?category=832245
- CI/CD사전툴설치
https://happycloud-lee.tistory.com/category/devops/CI%2C%20CD%20%ED%88%B4%20%EC%84%A4%EC%B9%98
- chartmuseum 설치
https://happycloud-lee.tistory.com/8?category=832245
사전 준비가 끝났으면 이제 시작해 봅시다.
작업순서는 아래와 같습니다.
1. giblab에 새 project생성 후 eclipse에서 node.js 프로그램 작성하여 gitlab에 push
2. helm chart 작성하여 chartmuseum repository에 push
3. Jenkins pipeline작성
1. giblab에 새 project생성 후 eclipse에서 node.js 프로그램 작성하여 gitlab에 push
아래 링크를 참조하여 작업합니다.
2. gitlab에 새 프로젝트 작성 후 eclipse에서 gitlab 프로젝트 연결
4. eclipse에서 gitlab으로 소스 Pull/Push
프로그램 소스는 아래를 이용하세요. 다르게 작성해도 상관 없습니다.
- app.js
var http = require('http');
var os = require('os');
var port = 8082;

http.createServer( (req, res) => {
  console.log('Requested: ' + req.url);
  res.writeHead(200, { 'Content-Type':'text/html' });
  res.write('<h1>Hello, Happy helm !</h1>');
  res.end();
}).listen(port, () => {
  console.log('Listen ... ' + os.hostname()+':'+port);
});
- Dockerfile 은 deployment디렉토리 하위에 만드시고 내용은 아래를 참조하세요.
FROM node:carbon
COPY app.js .
EXPOSE 8082
CMD node app.js
- gitlab에 푸시
- docker image buile & push
푸시한 후 helm chart를 만들기 위해 docker image를 build하여 docker registry에 push합니다.
먼저, VM에 작업할 디렉토리를 만듭니다.
$ mkdir -p ~/apps && cd ~/appls
gitlab에서 소스를 가져옵니다. git source주소는 본인걸로 바꾸십시오.
$ git clone http://gitlab.169.56.164.244.nip.io:31836/ondalk8s/hello-helm.git
docker image를 build합니다. private docker registry의 주소는 본인거에 맞게 변경하세요.
$ cd hello-helm
$ sudo docker build -t myreg.com/hello-helm $PWDsudo docker build -f deployment/Dockerfile -t myreg.com/hello-helm .
docker image를 private docker registry에 push합니다.
id와 pw는 본인에 맞게 수정하세요.
$ sudo docker login http://myreg.com -u ondalk8s -p passw0rd
$ sudo docker push myreg.com/hello-helm
2. helm chart 작성하여 chartmuseum repository에 push
이 작업은 아래 링크를 참조하여 수행하십시오.
2. Helm chart 생성, 테스트, 패키징, Helm Repository에 배포하기
그리고, 위 글에서는 github chart repository로 push했는데, 이번에는 chartmuseum repository로 push하시기 바랍니다.
chartmuseum으로 push하는 방법은 아래 글을 참조하세요.
3. chartmuseum으로 private helm repository 만들기
3. Jenkins pipeline작성
jenkins pipeline은 Get source from gitlab -> Buil/push App image -> Clean up current deployments -> Deploy to cluster로 구성합니다. slack과 gmail 연동을 포함하여 예제소스가 작성되어 있습니다. 이 부분은 제거하셔도 됩니다.
slack, gmail연동까지 해 보시려면 아래 링크를 먼저 참조하십시오.
https://happycloud-lee.tistory.com/60?category=832248
10. CI/CD Pipeline 5차 버전 개발: Slack 연동
https://hiondal.blog.me/221632006551 10. CI/CD Pipeline 5차 버전 개발: Slack 연동 Pipeline 빌드의 진행상황을 Slack의 특정채널로 통지하는 기능을 추가해 보도록 하겠습니다.사전에 J... blog.naver.com
happycloud-lee.tistory.com
https://happycloud-lee.tistory.com/61?category=832248
11. CI/CD Pipeline 6차 버전 개발: gmail 연동
https://hiondal.blog.me/221632585358 11. CI/CD Pipeline 6차 버전 개발: gmail 연동 gmail을 SMTP서버로 이용하여 CI/CD 진행상황을 이메일로 통보해 보도록 하겠습니다.1. Jenkins... blog.naver.com
happycloud-lee.tistory.com
1) elipse에서 Jenkins pipeline 소스 작성
eclipse에서 deployment디렉토리 하위에 Jenkinsfile과 pipeline.properties파일을 만듭니다.
Jenkinsfile의 내용은 아래와 같이 작성합니다.
자신에 맞게 변경할 부분은 아래와 같습니다.
- 통지받을 메일 수신처: def emailRecipients="hiondal@gmail.com,hiondal@daum.net"
- gitlab 주소: git "http://gitlab.169.56.164.244.nip.io:31836/ondalk8s/hello-helm.git"
def label = "hello-helm-${UUID.randomUUID().toString()}"

/* -------- functions ---------- */
def notifySlack(STATUS, COLOR) {
	slackSend (color: COLOR, message: STATUS+" : " +  "${env.JOB_NAME} [${env.BUILD_NUMBER}] (${env.BUILD_URL})")
}

def notifyMail(STATUS, RECIPIENTS) {
	emailext body: STATUS+" : " +  "${env.JOB_NAME} [${env.BUILD_NUMBER}] (${env.BUILD_URL})",
	subject: STATUS + " : " + "${env.JOB_NAME} [${env.BUILD_NUMBER}]",
	to: RECIPIENTS
}
/* ------------------------------ */

def emailRecipients="hiondal@gmail.com,hiondal@daum.net"

notifySlack("STARTED", "#FFFF00")
notifyMail("STARTED", "${emailRecipients}")

podTemplate(
	label: label,
	containers: [
		//container image는 docker search 명령 이용
		containerTemplate(name: "docker", image: "docker:stable", ttyEnabled: true, command: "cat"),
		containerTemplate(name: "helm", image: "dtzar/helm-kubectl", ttyEnabled: true, command: "cat")
	],
	//volume mount
	volumes: [
		hostPathVolume(hostPath: "/var/run/docker.sock", mountPath: "/var/run/docker.sock")
	]
)
{
	node(label) {
		stage("Get source from gitlab") {
			git "http://gitlab.169.56.164.244.nip.io:31836/ondalk8s/hello-helm.git"
		}

		//-- 환경변수 파일 읽어서 변수값 셋팅
		def props = readProperties  file:"./deployment/pipeline.properties"
		def tag = props["version"]
		def dockerRegistry = props["dockerRegistry"]
		def credentialRegistry=props["credentialRegistry"]
		def image = props["image"]
		def baseDeployDir = props["baseDeployDir"]
		def helmRepository = props["helmRepository"]
		def helmChartname = props["helmChartname"]
		def helmChartfile = "${baseDeployDir}/${helmChartname}-${tag}.tgz"
		def releaseName = props["releaseName"]
		def namespace = props["namespace"]

		try {

			stage("Buil/push App image") {
				container("docker") {
					docker.withRegistry("${dockerRegistry}", "${credentialRegistry}") {
						sh "docker build -f ${baseDeployDir}/Dockerfile -t ${image}:${tag} ."
						sh "docker push ${image}:${tag}"
						sh "docker tag ${image}:${tag} ${image}:latest"
						sh "docker push ${image}:latest"
					}
				}
			}

			stage( "Clean up current deployments" ) {
				container("helm") {
					try {
						sh "helm delete ${releaseName} --purge"
					} catch(e) {
						echo "Clear-up Error : " + e.getMessage()
						echo "Continue process !"
					}
				}
			}

			stage( "Deploy to cluster" ) {
				container("helm") {
					echo "Install with chart file !"
					sh "helm install ${helmChartfile} --name ${releaseName} --namespace ${namespace}"
				}
			}

			notifySlack("${currentBuild.currentResult}", "#00FF00")
			notifyMail("${currentBuild.currentResult}", "${emailRecipients}")
		} catch(e) {
			currentBuild.result = "FAILED"
			notifySlack("${currentBuild.currentResult}", "#FF0000")
			notifyMail("${currentBuild.currentResult}", "${emailRecipients}")
		}
	}
}
Helm관련된 부분을 간단히 설명하겠습니다.
- containerTemplate(name: "helm", image: "dtzar/helm-kubectl", ttyEnabled: true, command: "cat")
helm container생성 시 image를 정의
- sh "helm delete ${releaseName} --purge"
helm으로 배포된 기존 release 지우기: deployment, service, ingress등의 리소스를 전부 지웁니다.
- sh "helm install ${helmChartfile} --name ${releaseName} --namespace ${namespace}"
helm chart를 배포합니다.
pipeline.properties 파일은 아래와 같습니다.
아래 항목은 자신에 맞게 변경하십시오.
- dockerRegistry: private docker registry 주소
- credentialRegistry: private docker registry 로그인 credential
- image: docker image
- helmRepository: chartmuseum helm repository 명
version=0.1.0
namespace=helm
dockerRegistry=http://myreg.com
credentialRegistry=credential_localreg
image=myreg.com/hello-helm
baseDeployDir=./deployment
helmRepository=chartrepo
helmChartname=hello-helm
releaseName=release-hello-helm
private docker registry를 로그인하기 위한 credentialRegistry를 안 만들었으면 아래와 같이 만드십시오.
https://happycloud-lee.tistory.com/64?category=832248
2) helm chart 업로드
VM 콘솔상에서 만들어진 helm chart 압축파일(helm-hello-0.1.0.tgz)을 eclipse 프로젝트의 deployment디렉토리 밑에 복사합니다.
MobaXTerm의 기능을 이용하여 PC에 download한 후 PC에서 파일을 복사하여 eclipse에 붙여넣기하면 됩니다.
- sftp탭 선택->chart파일 선택 후 우측 마우스 메뉴 이용 다운로드

- 다운로드한 chart파일을 선택하고 CTRL-C로 복사

- eclipse project의 deployment디렉토리 선택하고 CTRL-V로 붙여넣기

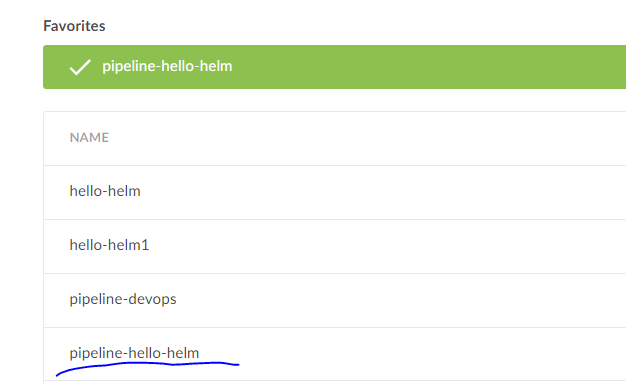
3) Jenkins에서 새 Pipeline을 작성
Jenkins에서 아래와 같이 새 pipeline을 작성합니다. 이름은 적절하게 부여하시면 됩니다.

pipeline 환경설정 및 실행은 아래 글의 '2. Pipeline 수행' 부분을 참조하십시오.
https://hiondal.blog.me/221631901346
6. CI/CD Pipeline 1차 버전 개발: 기본 Pipeline
가장 기본적인 Pipeline을 만들어 보겠습니다. 이 pipeline의 단계(Stage)는 아래와 같이 4개 입니다. (...
blog.naver.com
결과 확인은 Blue Ocean plugin을 사용해서 해 보겠습니다.
사전에 Blue Ocean plugin이 설치되어 있어야 합니다. : 여기를 참조하여 설치하세요.


맨 마지막 Stage의 'Shell Script'를 펼쳐 보면 Helm chart가 설치된 결과를 볼 수 있습니다.

맨 마지막에 있는 실행 주소를 복사하여 웹브라우저에서 열어 보십시오.
아래와 같이 나오면 정상적으로 배포된것입니다.

'Agile&DevOps > helm' 카테고리의 다른 글
| 4. Helm chart 이용 Jenkins CI/CD Pipeline: helm repository통한 배포 (0) | 2019.09.14 |
|---|---|
| 4. Helm chart 이용 Jenkins CI/CD Pipeline: 무중단 배포 (2) | 2019.09.14 |
| 3. chartmuseum으로 private helm registry 만들기 (0) | 2019.09.11 |
| 0. 사전준비: github에 helm repository 만들기 (0) | 2019.09.10 |
| 2. Helm chart 생성, 테스트, 패키징, Helm Repository에 배포하기 (2) | 2019.09.10 |
- Total
- Today
- Yesterday
- 스핀프로젝트
- 애자일
- 호모프롬프트
- SAGA
- CQRS
- 마이크로서비스 패턴
- 요즘남편 없던아빠
- 플러그인
- Event Sourcing
- 분초사회
- 디토소비
- 버라이어티가격
- 육각형인간
- 리퀴드폴리탄
- spotify
- AXON
- 도파밍
- #MAS
- API Composition
- 마이크로서비스
- agentic ai
- AI
- agile
- 돌봄경제
- micro service
- 스포티파이
| 일 | 월 | 화 | 수 | 목 | 금 | 토 |
|---|---|---|---|---|---|---|
| 1 | 2 | 3 | 4 | 5 | 6 | 7 |
| 8 | 9 | 10 | 11 | 12 | 13 | 14 |
| 15 | 16 | 17 | 18 | 19 | 20 | 21 |
| 22 | 23 | 24 | 25 | 26 | 27 | 28 |